Tuesday, December 29, 2015

Loft wall: Ice Day

The tiny house is coming along nicely: here is an overview picture:
 we have worked out a good set-up for working on it: we set up the chop saw, put the compressor in the trunk of the car, and run the cord to it -- this is after we get it started up by the building--the compressor warms up better, when plugged directly into the outlet, rather than on a cord. Usually, I roll the little trailer down here too--it has all the tools on it.

Today it started out sunny, but we had just had snow and ice, so everything was covered with about 1/4 inch of ice.  Of course, you can't nail boards together with that much ice on them, and if the construction adhesive is going to work, you need to have no ice. The F-26 construction adhesive I use says it sticks to wet lumber, and to frozen lumber, but I can't see that anything would stick to wet frozen lumber.


So, we started the day by chipping the ice off the surfaces where we needed the boards to go:


Then, I cut the studs to length, and put notches in the end of each one. The notch is where the last rafter will sit:


We glued and nailed the wall together:


Then, the two of us got it up into place:


But most of the notches didn't quite fit under the last rafter, so we took it down, carefully, without squashing Beth (no pictures, because my photographer was busy lifting a wall). I cut the notches a little longer, and put it back up. This time it fit just right, so I glued it in place, and nailed it up:


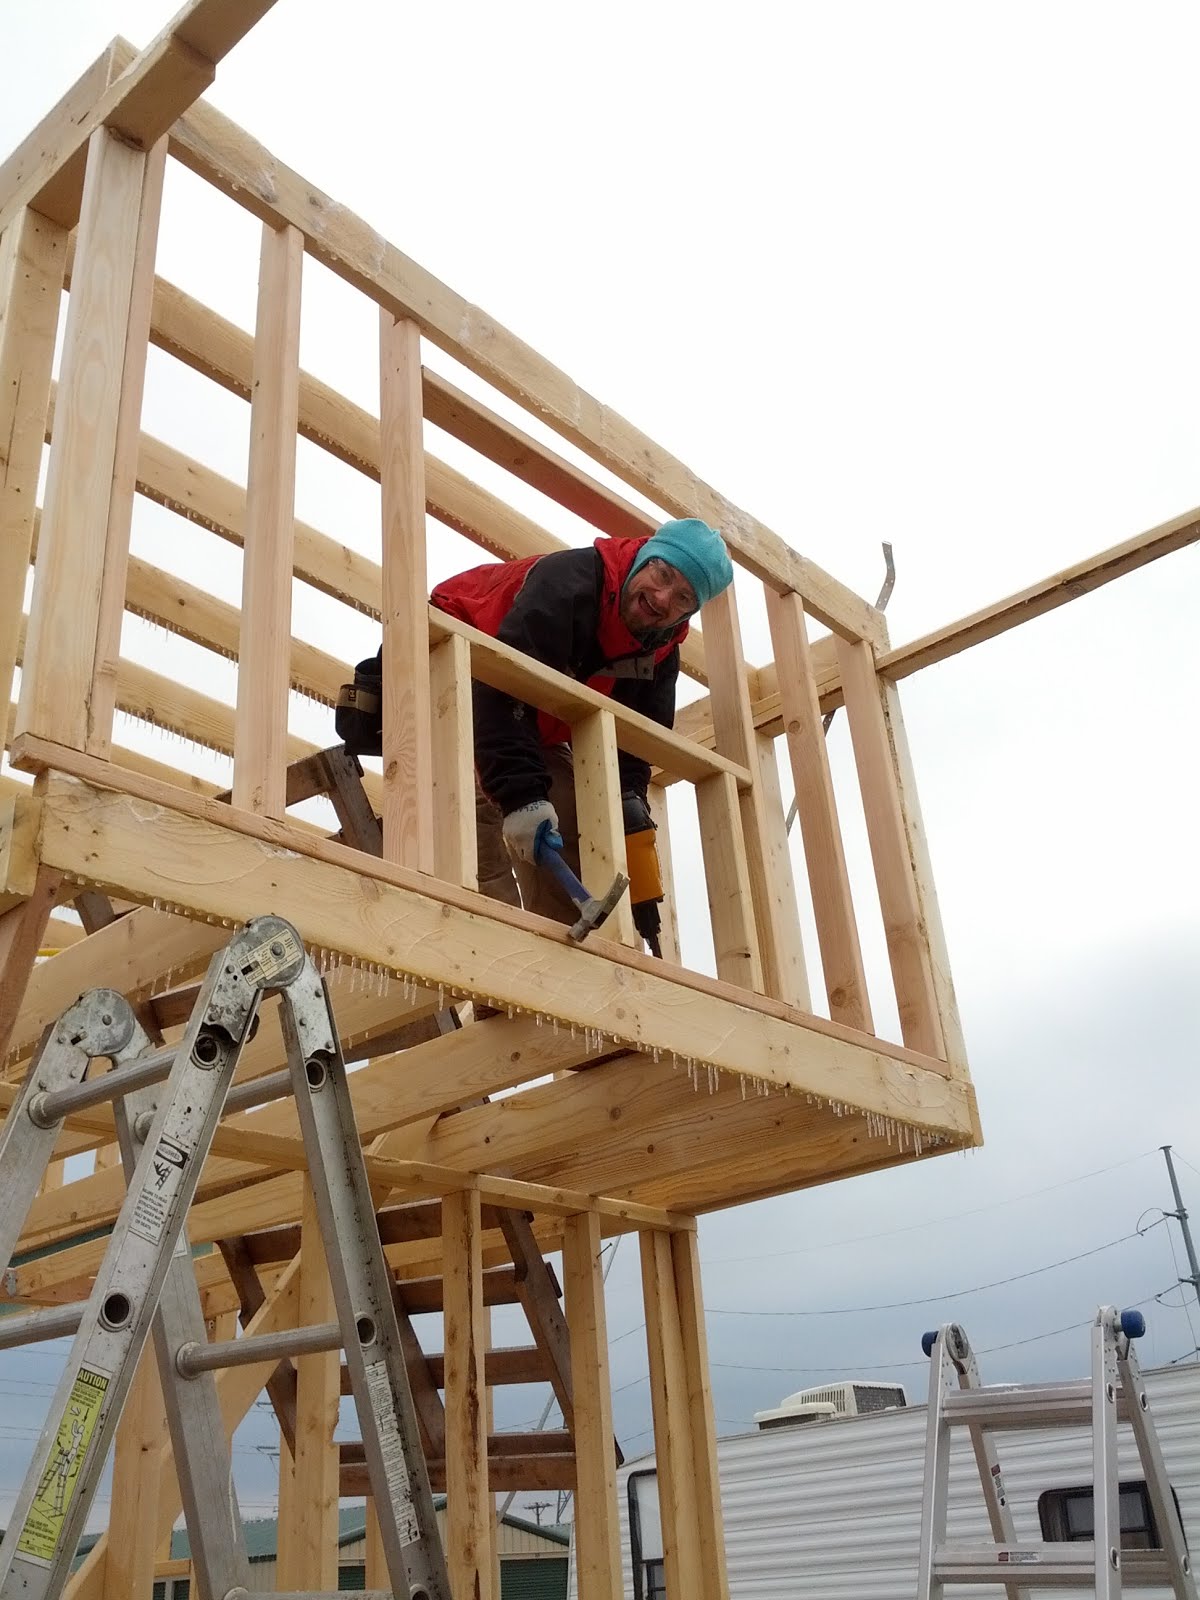
Now this is the view from the loft. This frame will have a half-moon window in it:

Still have a couple short "cripple" studs to put in above the window frame, but this is enough for the day, so we quit and went inside and warmed our toes and fingers.

Loft overhang

With the loft able to be walked on, we finished the last couple rafters--it was easier when we had something to stand on:


Then, I put in an angle brace to support the "bump out" where the loft cantilevers off the end of the trailer. I guess it's not really a cantilever, if I have braces. This video describes it in detail. This brace is the first of many:

On Christmas Day I didn't do any construction: I went for a 20 mile hike with a friend. I'm eating a snack at the furthest-out point.


Rafters and Loft

Over the last couple weeks, we have been slowly getting the framing finished up.
Here are the rafters being installed. We put "cat boards" between the rafters to help hold them to the wall, and help keep them from falling over.

Tobias measured each board, and Beth would cut it to length, so that small inaccuracies wouldn't accumulate and mess up the spacing of the rafters.


Some of them we did in the dark:

We didn't quite do all the rafters before starting on the Loft joists.

We cut each joist so that it tapered from a 2x4 to a 2x6. That way, we had more headroom in the kitchen where it mattered, but still had a 2x6 at the support wall and cantilever, where that mattered.


Nailed the joists in place. We used joist hangers to connect them to the band board, which was double 2x4s:
 Be sure to use the "toe-nail" holes provided in the joist hangers--without them, even with nails straight through the band-board, into the end of the joist, the joists come away from the band board. When we first got up on the loft, it started coming loose, and we got down clarefully, and added the toe-nails (using long nails, as specified by the joist hanger).

 I think the loft might be too spongy, so I might add a piece of 7 1/2" LVL to the band boards--I'll make the bottom flush, and extend the LVL up, making a lip on the edge of the loft. In this picture, you can barely see the taper in the joists:


All the joists in place: (looking across the loft, through the missing end wall)


Here we are adding the outside band board to the joists:


And here is the overview, showing the "bump out" where the loft cantilevers over the end of the trailer: (the headplates will be trimmed off later)


We will add angle braces under the bump-out, to hold it up. That angled wall will be the insulated/weatherproof wall, so we will have some additional storage space behind the kitchen counter/cabinets. OR, we could put in doors from the outside. or maybe a combination.

Wednesday, December 9, 2015

Further Framing

This week, the weather has been beautiful. We have been continuing to get the framing done. We are putting on cross-braces:


and bolting the frame to the trailer. Here is a strap, nailed to the stud, and bolted to the trailer bed. Not shown is a cross-brace strap that shares this bolt (connects under the trailer):


There are two straps here. The one going from mid left to lower right is a long cross brace. It bends around the corner of the trailer, and is picked up by the bottom of this bolt. The strap from mid right to lower center is just a short strap to connect this corner stud assembly to the trailer bed. Nailed it to the studs, and then tightened the nut.


We also started on the Rafters. Cutting Rafters: (we didn't cut the surface where it sits on the wall, just making the ends vertical)


Here are some of the rafters, installed. We are putting blocks between the rafters. It helps connect them to the top plate, and to hold them vertical.


The Walls Go Up

With all the excellent help we had over our icy Thanksgiving,  we made great progress on framing the south wall. This was the most challenging wall, with lots of windows.


Because of the work done on the rainy weekend, the next weekend made lots of visible progress. The other side of the family came, and we put up the walls that we had made in the snow. Here is the first wall:


One corner, neat and square:


We put together some other walls, and kept putting them up.

This is the window in the loft "bump-out" that extends beyond the back of the trailer:


And another couple walls:


Once the walls were up, we needed to adjust the squareness a bit. Here Tobias is pulling a rope tight, while Isaac stands by to clamp the rope in place with vise-grips when it is tight:


Then we put on bracing straps to keep it square, even when going down the road, or being hit by geese at high speeds:


It was great to have my family here, to help get this framed. It was a flat trailer on friday...and sunday it had all the main walls! Thanks guys!

Friday, November 27, 2015

Framing

We had family over for Thanksgiving, so we decided to frame the walls. Well, maybe a wall. Well. It was raining, and freezing, and everything was covered with a layer of ice. Seemed like a great day to build.


We set up to cut the boards. It kept sleeting. The toe-plate of the first wall is sitting in the right-hand foreground.


And then one wall is nearly put together!


One wall, tapered for the slope of the roof. Four corners all nailed together.

Having a hot-chocolate break.
We had to nurse the compressor to life every so often---it didn't like the cold.

Here is a list of all the sticks needed for the second wall.

We got the second wall section put together. We put both walls back on the trailer, and packed everything up. Then we went back inside where it was warm. We had to scrape the ice off the car, again.

Getting Lumber

We got a load of lumber! This is most of the walls:
 We ordered a whole bunch of boards, and later in the day, met a truck that carried them all.


The driver dumped the bed until the bundles slid down and the ends rested on the ground. Then the driver put some scrap wood under the bundles.


Then he drove forward, dropping the lumber bundles onto the scrap lumber, so it would be off the ground.

Monday, November 23, 2015

South Wall Diagram

I think I have the south wall layout complete. Is this too many windows?
The little hashmarks are where there is glass. The arrows show where I can put angle-braces: strap or all-thread.

Saturday, November 21, 2015

Wall Layout

We are getting ready for a work day: Framing the walls. I'm laying out the studs and headers: here I'm partway done with one wall:
We are having a work day soon, so I need to know where all the wall studs go.

Monday, November 9, 2015

Subfloor Done; Pallet Walls


There had been some rain, so I had covered up the trailer. The Advantech subflooring is rated for 300 days of being exposed to weather, but I didn't want the water to flow through the cracks and fill up the "bathtub" of the trailer.


I scraped off the excess foam that had swelled up too much to put down the last sheet of subfloor.

Once we had the subfloor finished, we started building walls out of pallets--temporary, of course, just to give a feel for how things fit:

And, here is a video:


Monday, October 26, 2015

Spray foam and subfloor

James and I masked off the plumbing:

Then we got suited up, and set up the spray foam, after eating a delicious lunch (not shown):


We didn't take any pictures while doing the spraying, because it was really complicated, but here we are, halfway done, moving the tanks:
You see, we had to spray a layer of foam in, and then quick, while it was soft, set the rigid foam on top, and then weight it down with a board, and if necessary, stand on it. We also had two boards that we were moving before each spray, to protect the tops of the joists from overspray. And I couldn't stop spraying for more than 30 seconds, or the foam in the nozzle would harden. It seemed like it was going to be really hard, and we rehearsed it to figure out how to do it. And we prayed about it. And, Praise God! it worked really well! We could see God at work, making possible a task that seemed too hard for us.


When the foam was done, we started on the decking.
 James and I cut and screwed down much of the decking today. It was hard to get all the screws in, but it worked out. We used battery drills, and a corded drill. The corded drill worked well to drill the self-drilling screw into the steel joists, but the battery impact driver finished them off better, with its incredible torque:

We glued down the subfloor to the joists. At the edges, we put sill seal, with glue on both sides. Here I am, putting down glue before placing a sheet:

Beth filled some left over gaps in the insulation, using Great Stuff:
 Using a scraper to clean off the excess, and put it where it was needed:
Then she sealed the decking with caulk. Hopefully this will help keep out the rain until we put on a roof.
It was a full day of foam and decking. Thank you James, for your help!